Rendering Minecraft in Renderman/RIS
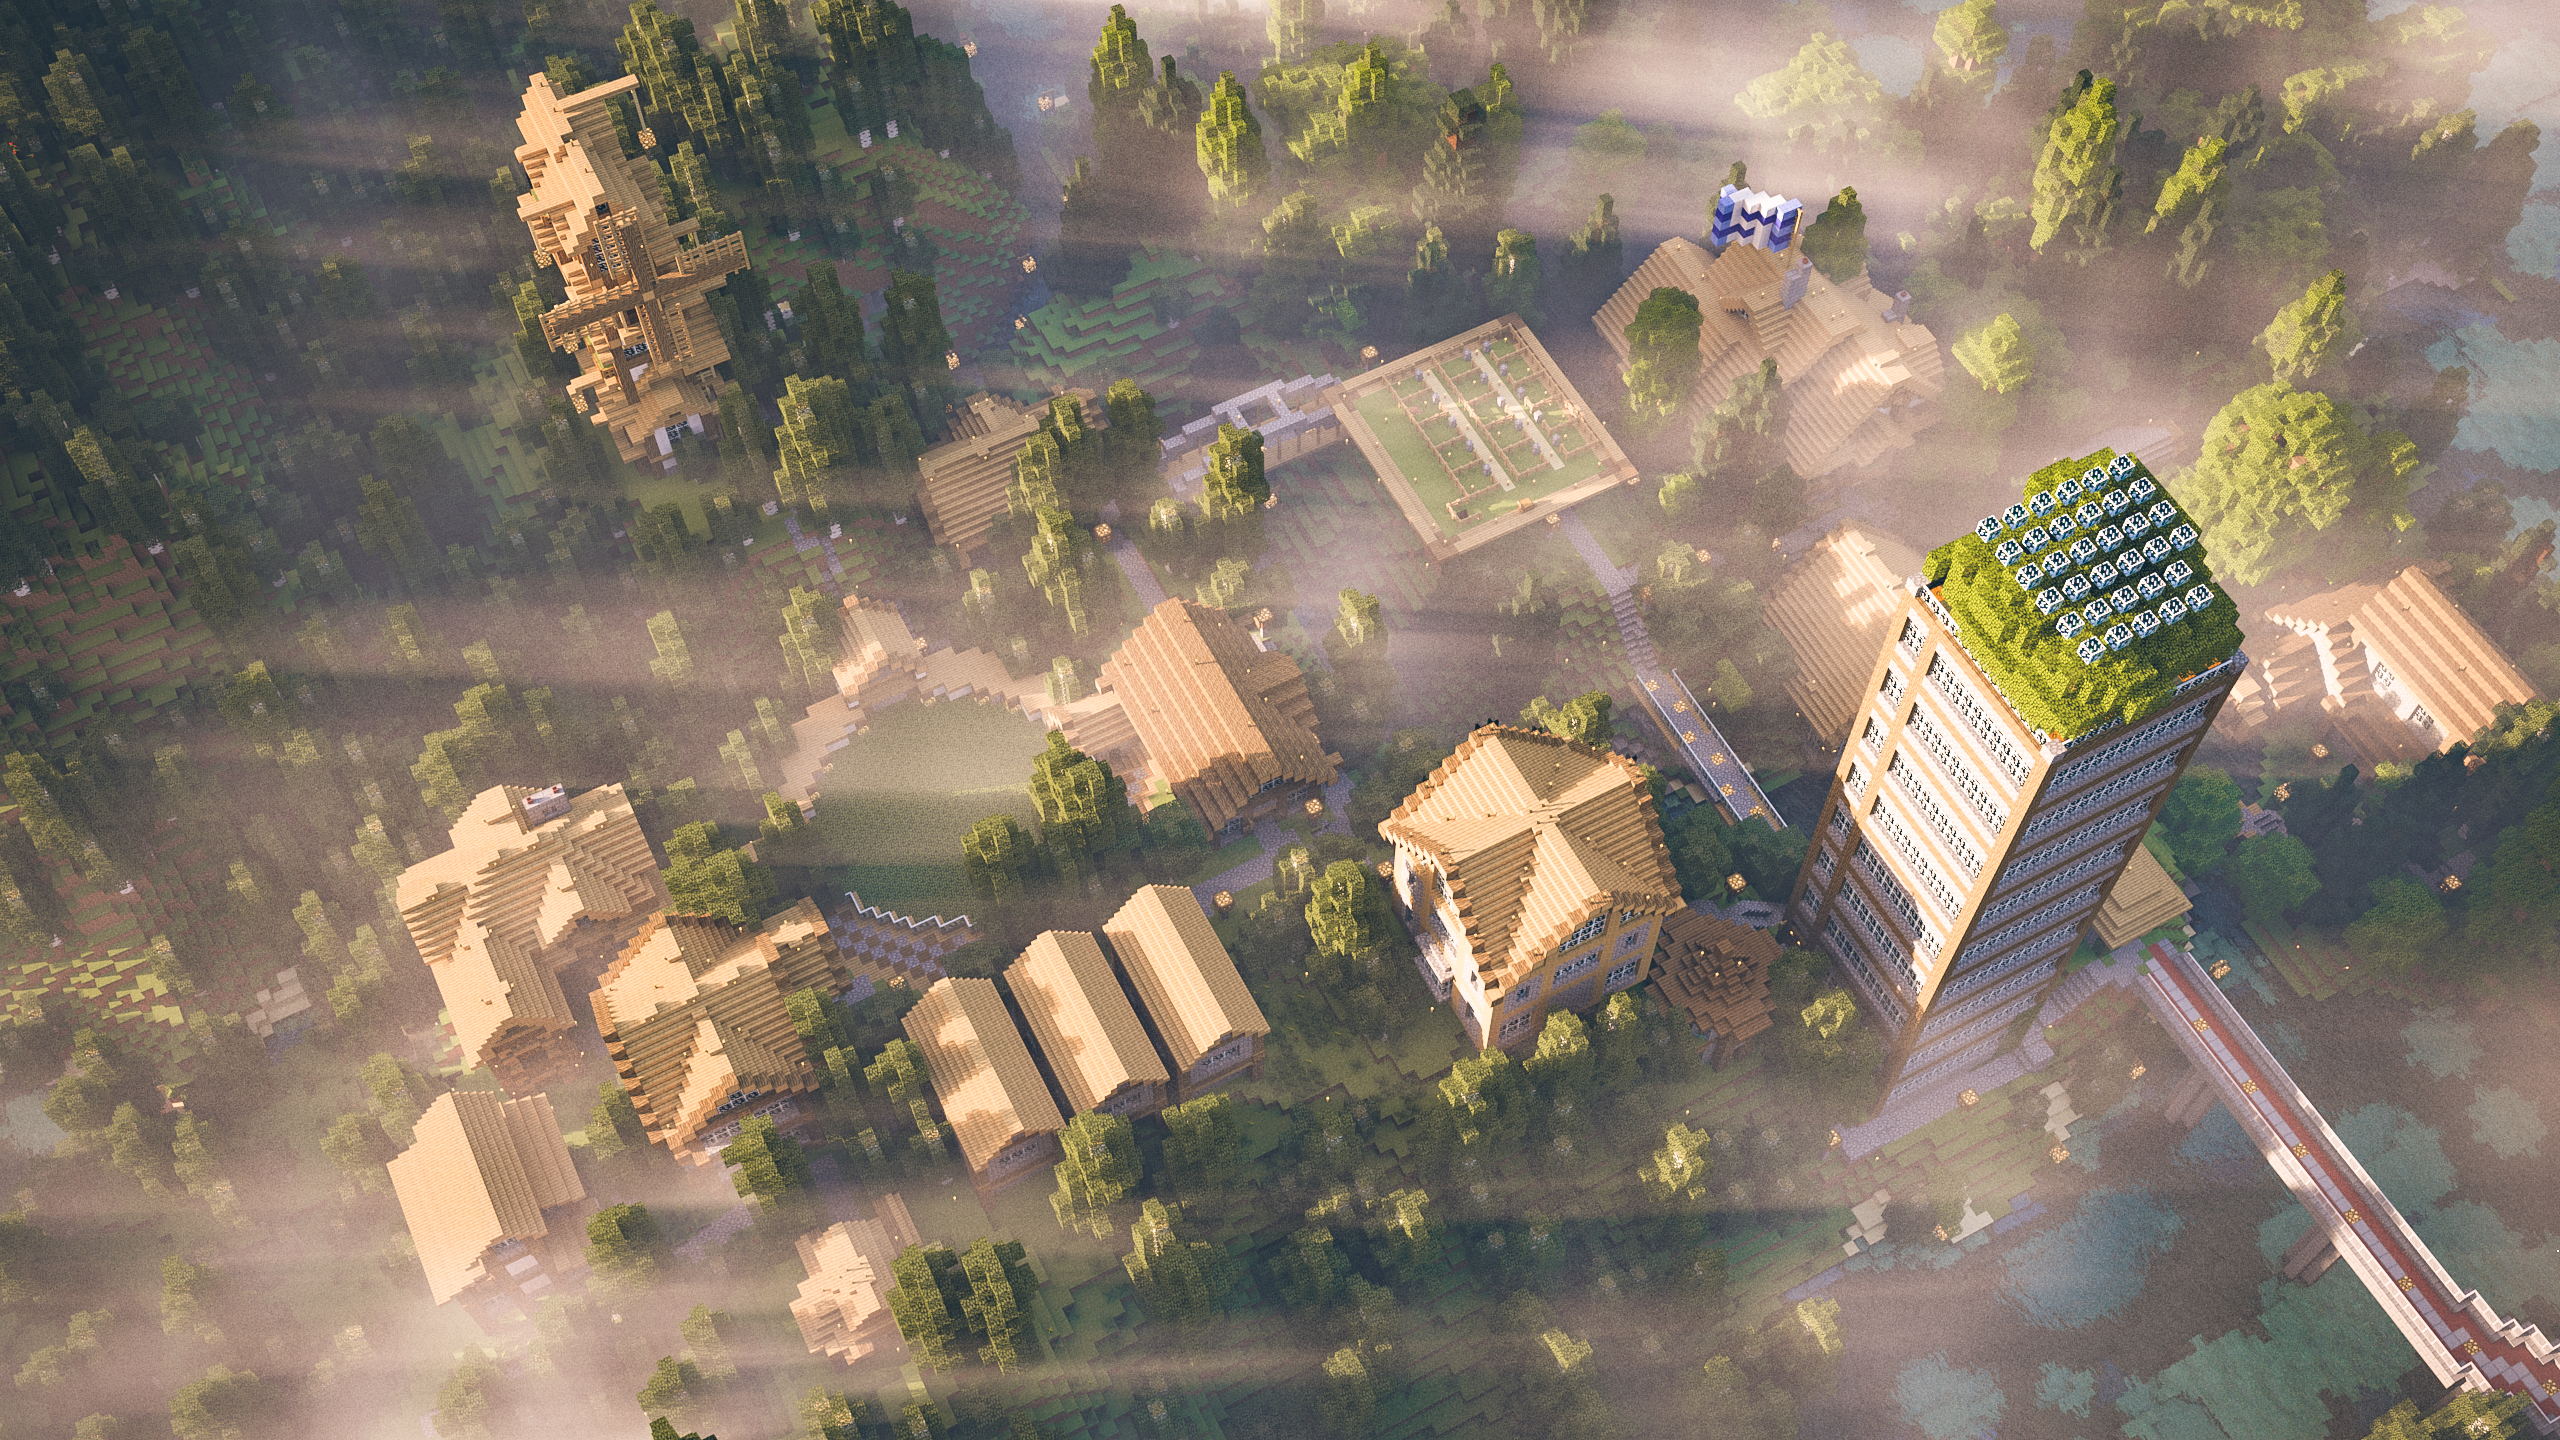
The vast majority of my computer graphics time is spent developing renderers (Disney’s Hyperion renderer as a professional, Takua Renderer as a hobbyist). However, I think having experience using renderers as an artist is an important part of knowing what to focus on as a renderer developer. I also think that knowing how a variety of different renderers work and how they are used is important; a lot of artists are used to using several different renderers, and each renderer has its own vocabulary and tried and true workflows and whatnot. Finally, there are a lot of really smart people working on all of the major production renderers out there, and seeing the cool things everyone is doing is fun and interesting! Because of all of these reasons, I like putting some time aside every once in a while to tinker with other renderers. I usually don’t write about my art projects that much anymore, but this project was particularly fun and produced some nice looking images, so I thought I’d write it up. As usual, before we dive into the post, here is the final image I made, rendered using Pixar’s Photorealistic Renderman 20 in RIS mode:
About two years ago, Pixar’s Photorealistic Renderman got a new rendering mode called RIS. PRman was one of the first production renderers ever developed, and historically PRman has always been a REYES-style rasterization renderer. Over time though, PRman has gained a whole bunch of added on features. At the time of Monsters University, PRman was actually a kind of hybrid rasterizer and raytracer; the rendering system on Monsters University used raytracing to build a multiresolution radiosity cache that was then used for calculating GI contributions in the shading part of REYES rasterization. That approach worked well and produced beautiful images, but it was also really complicated and had a number of drawbacks! RIS replaces all of that with a brand new, pure pathtracing system. In fact, while RIS is marketed as a new mode in PRman, RIS is actually a completely new renderer written almost completely from scratch; it just happens to be able to read Renderman RIB files as input.
Recently, I wanted to try rendering a Minecraft world from a Minecraft server that I play on. There are a lot of great Minecraft rendering tools available these days (Chunky comes to mind), but I wanted much more production-like control over the look of the render, so I decided to do everything using a normal CG production workflow instead of a prebuilt dedicated Minecraft rendering tool. I thought that I would use the project as a chance to give RIS a spin. At Cornell’s Program of Computer Graphics, Pixar was kind enough to provide us with access to the Renderman 19 beta program, which included the first version of RIS. I tinkered with the PRman 19 beta quite a lot at Cornell, and being an early beta, RIS had some bugs and incomplete bits back then. Since then though, the Renderman team has followed up PRman 19 with versions 20 and 21, which introduced a number of new features and speed/stability improvements to RIS. Since joining the Hyperion team, I’ve had the chance to meet and talk to various (really smart!) folks on the Renderman team since they are a sister team to us, but I haven’t actually had time to try the new versions of RIS. This project was a fun way to try the newest version of RIS on my own!
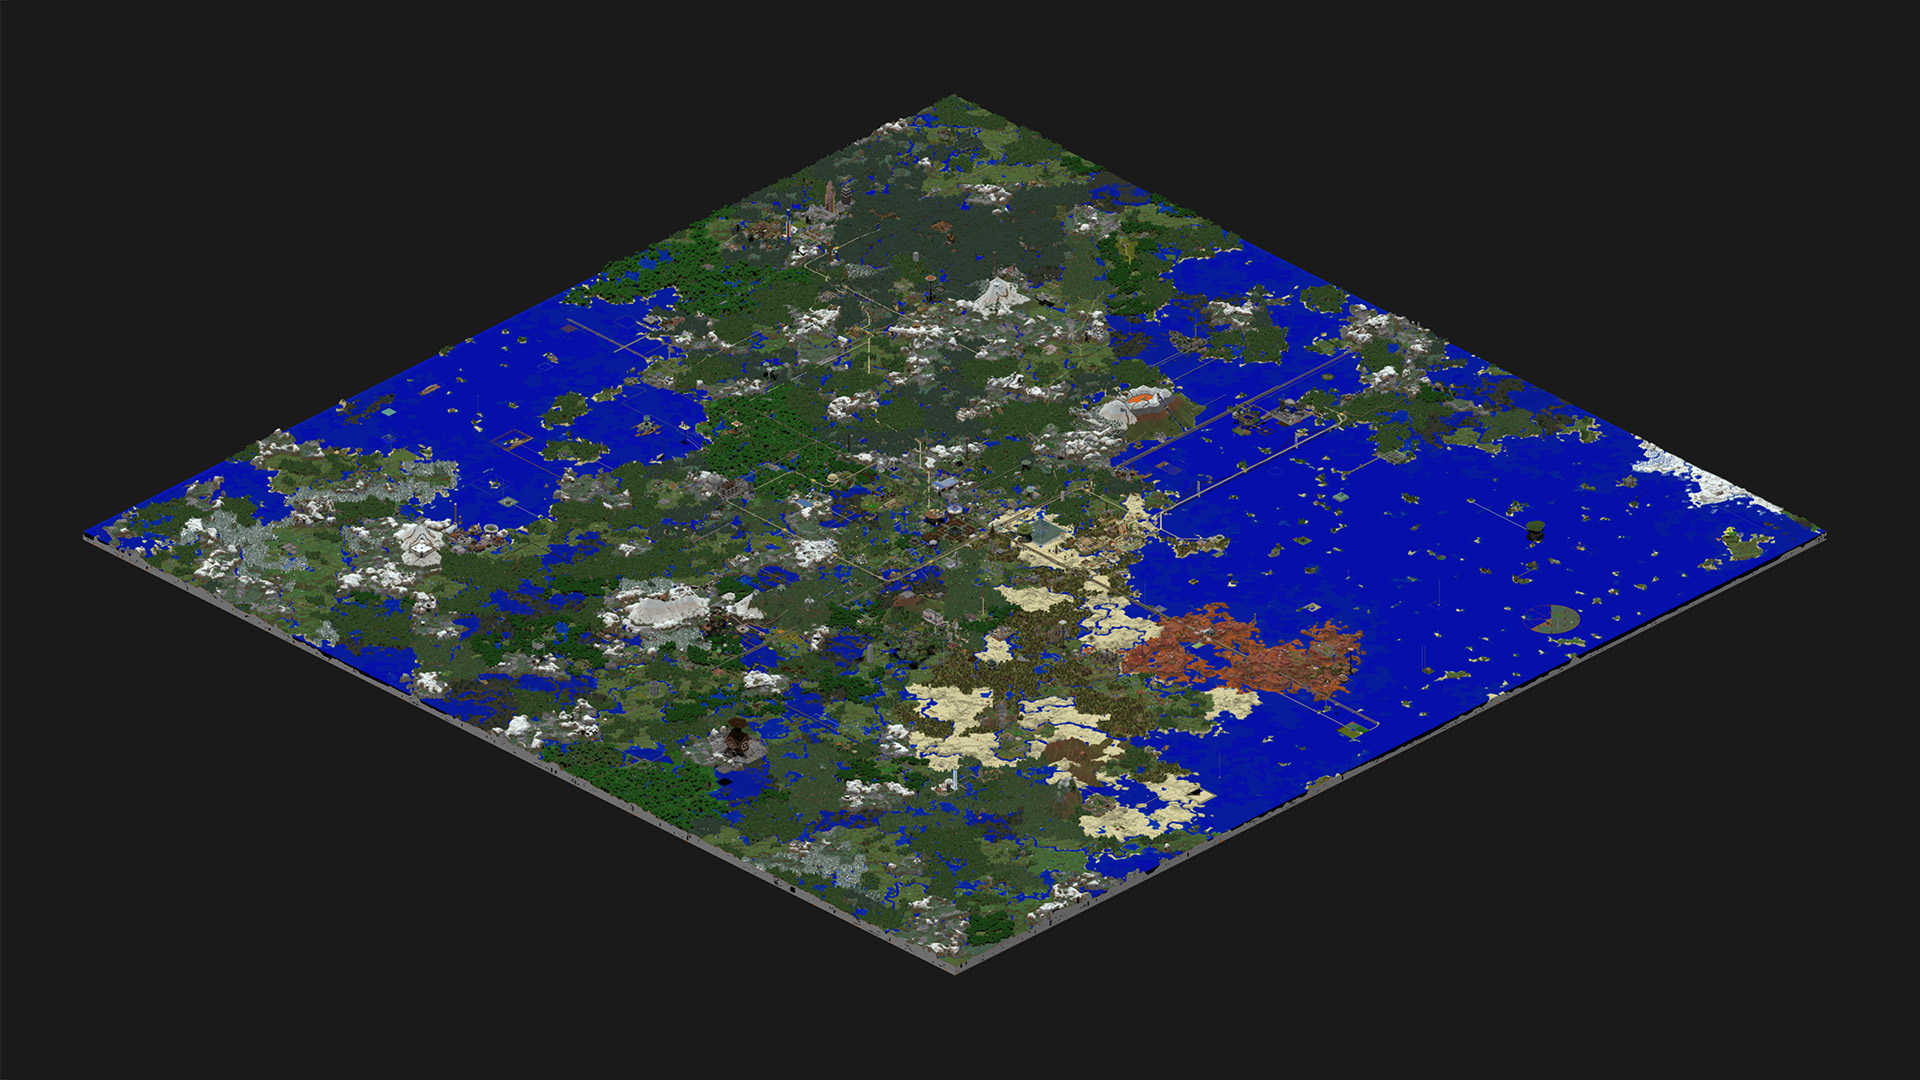
The Minecraft data for this project comes from the Nerd.nu community Minecraft server, which is run by a collective of players for free. I’ve been playing on the Nerd.nu PvE (Player versus Environment) server for years and years now, and players have built a mind-boggling number of amazing detailed creations. Every couple of months, the server is reset with a fresh map; I wanted to render a town that fellow player Avi_Dangerstein and I built on the previous map revision. Fortunately, all previous Nerd.nu map revisions are available for download in the server archives (the specific map I used is labeled pve-rev17). Here is an overview of the map revision I wanted to pull data from:
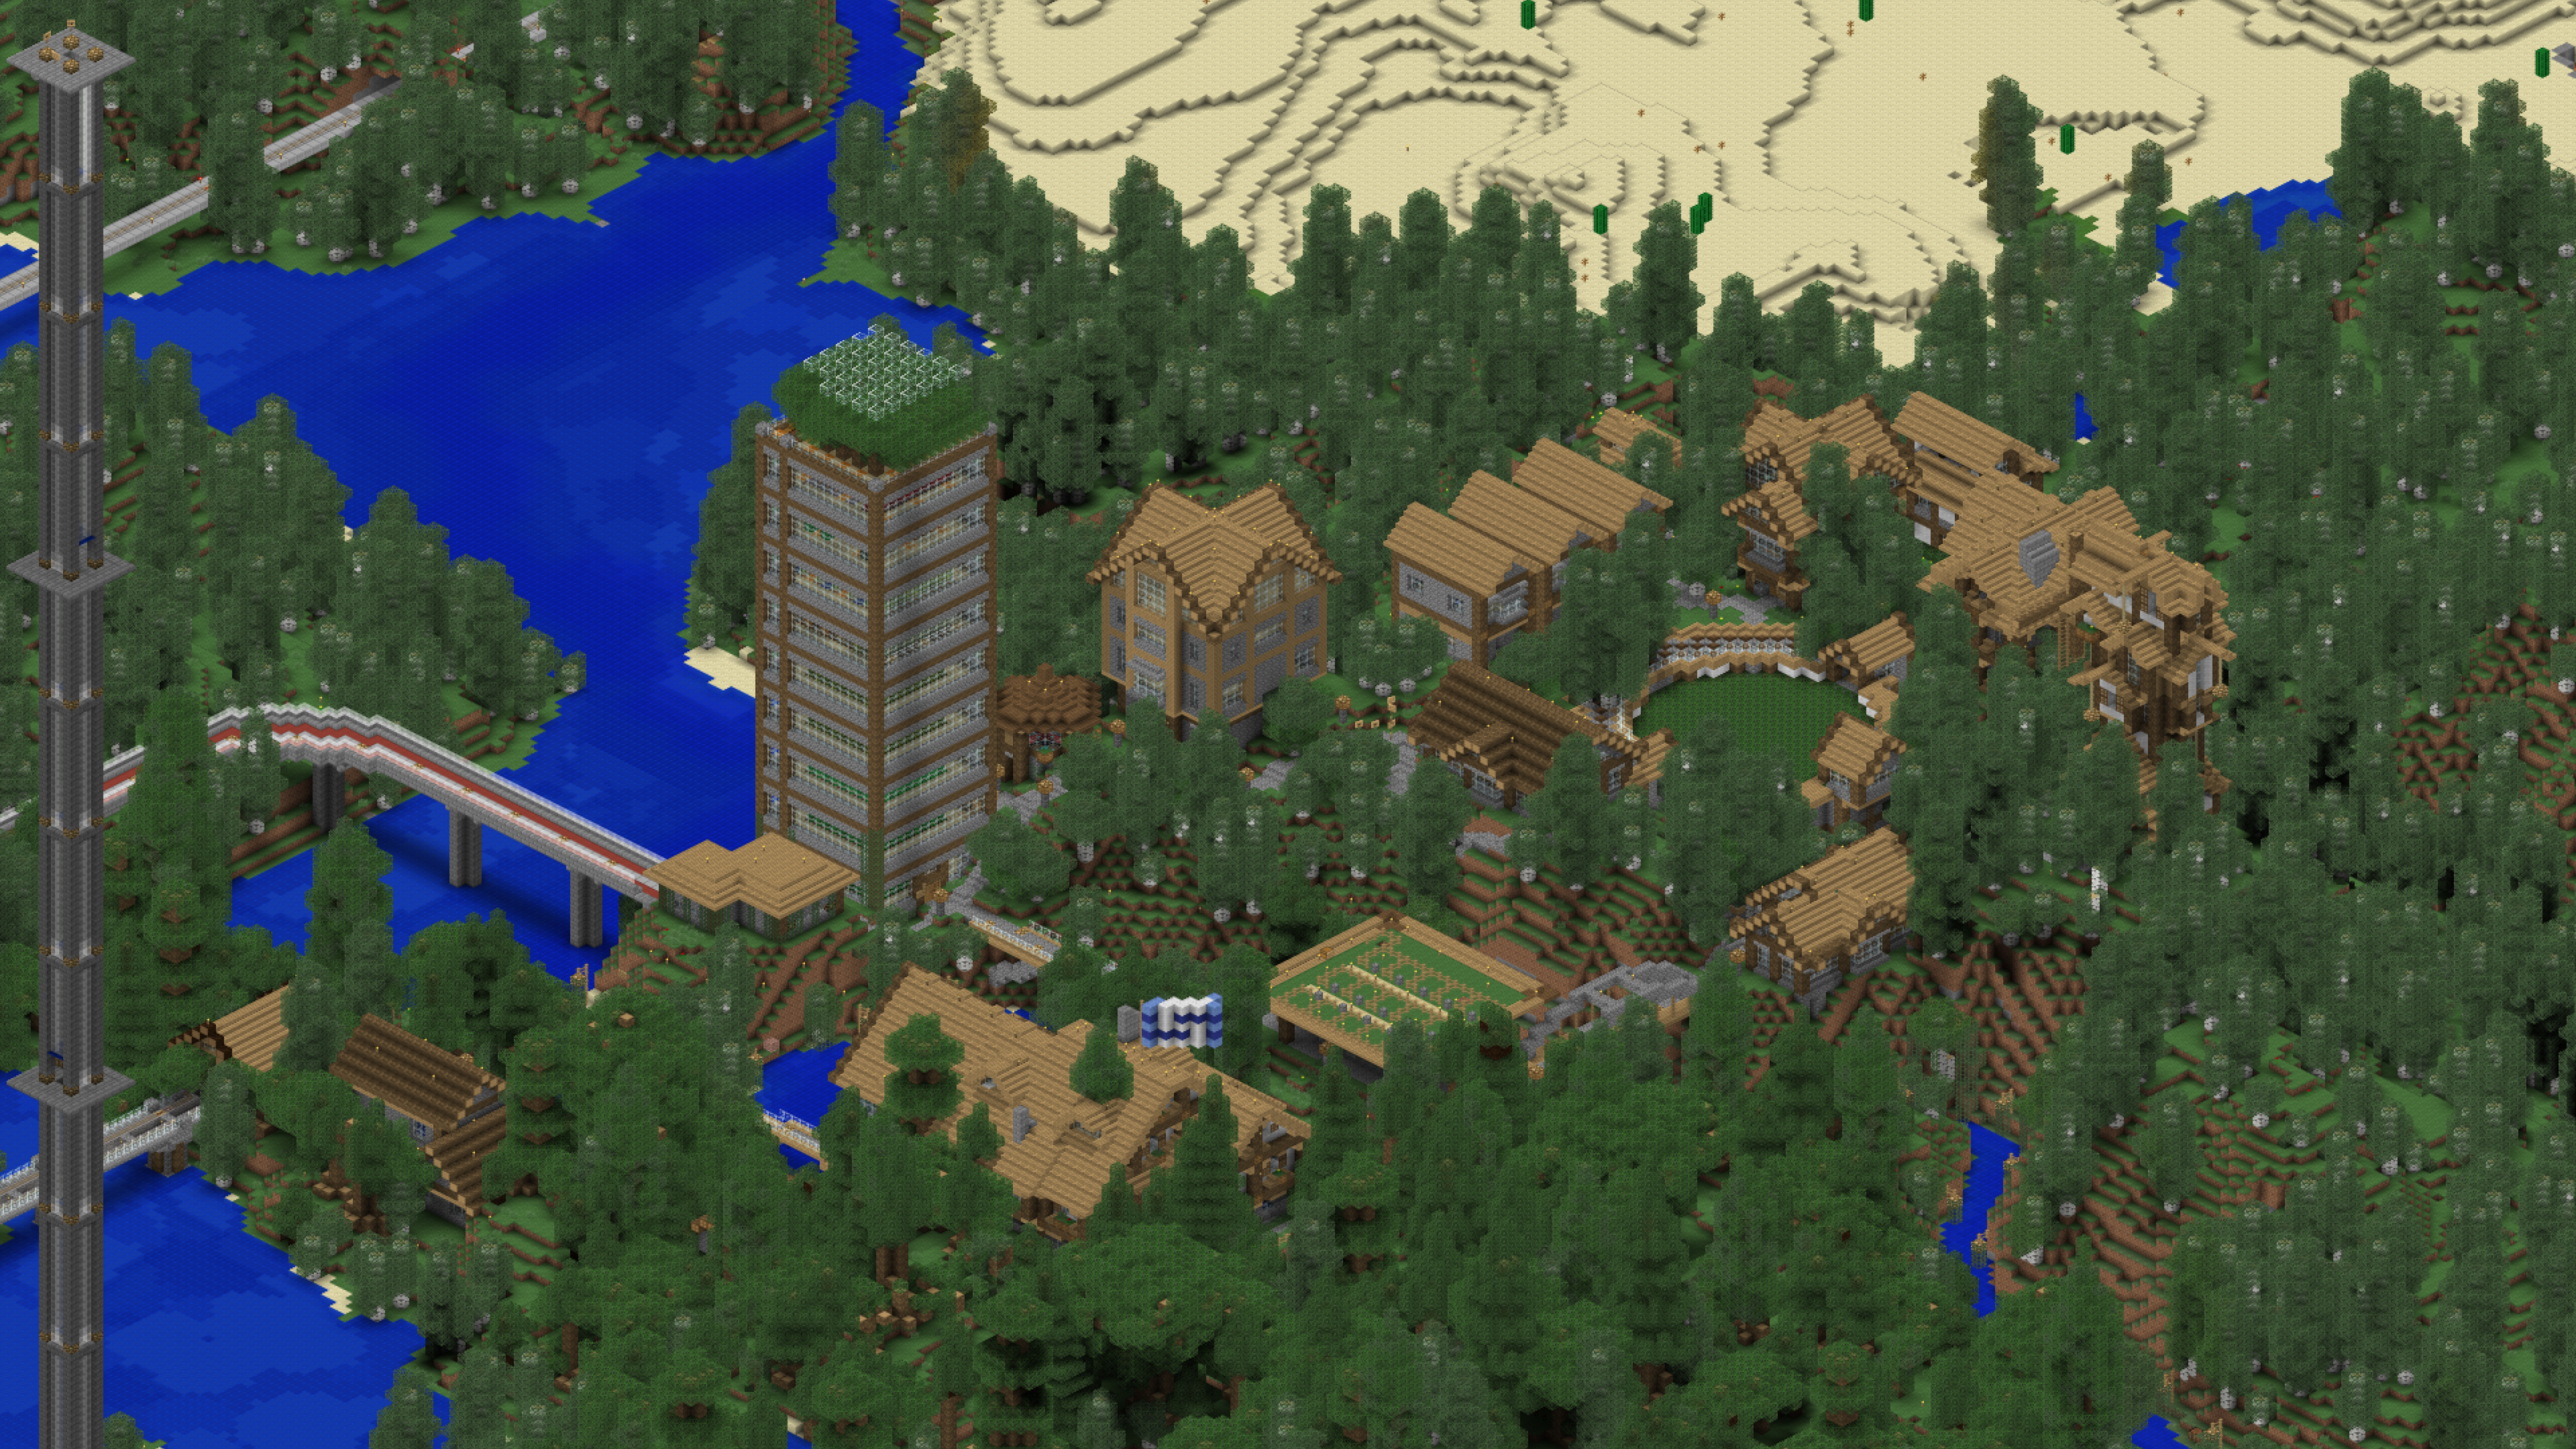
…and here is a zoomed in view of the part of the map that contains our town. The vast majority of the town was built by two players over the course of about 4 months. Our town is about 250 blocks long; the entire server map is a 6000 block by 6000 block square.
The first problem to tackle in this project was just getting Minecraft world data into a usable format. Pixar provides a free, non-commercial version of Renderman for Maya, and I’m very familiar with Maya, so my entire workflow for this project was based around good ol’ Maya. Maya doesn’t know how to read Minecraft data though… in fact, Minecraft’s chunked data format is a fascinating rabbit hole to read about in its own right. I briefly entertained the idea of writing my own Minecraft to Maya importer, but then I found a number of Minecraft to Obj exporters that other folks have already written. I first tried jmc2obj, but the section of the Minecraft world that I wanted to export was so large that jmc2obj kept running out of memory and crashing. Instead, I found that Eric Haines’s Mineways exporter was able to handle the data load well (incidentally, Eric Haines is also a Cornell Program of Computer Graphics alum; I inherited a pile of his ACM Transactions on Graphics hardcopies while at Cornell). The chunk of the world I wanted to export was pretty large; in the Mineways screenshot below, the area outlined in red is the part of the world that I wanted:
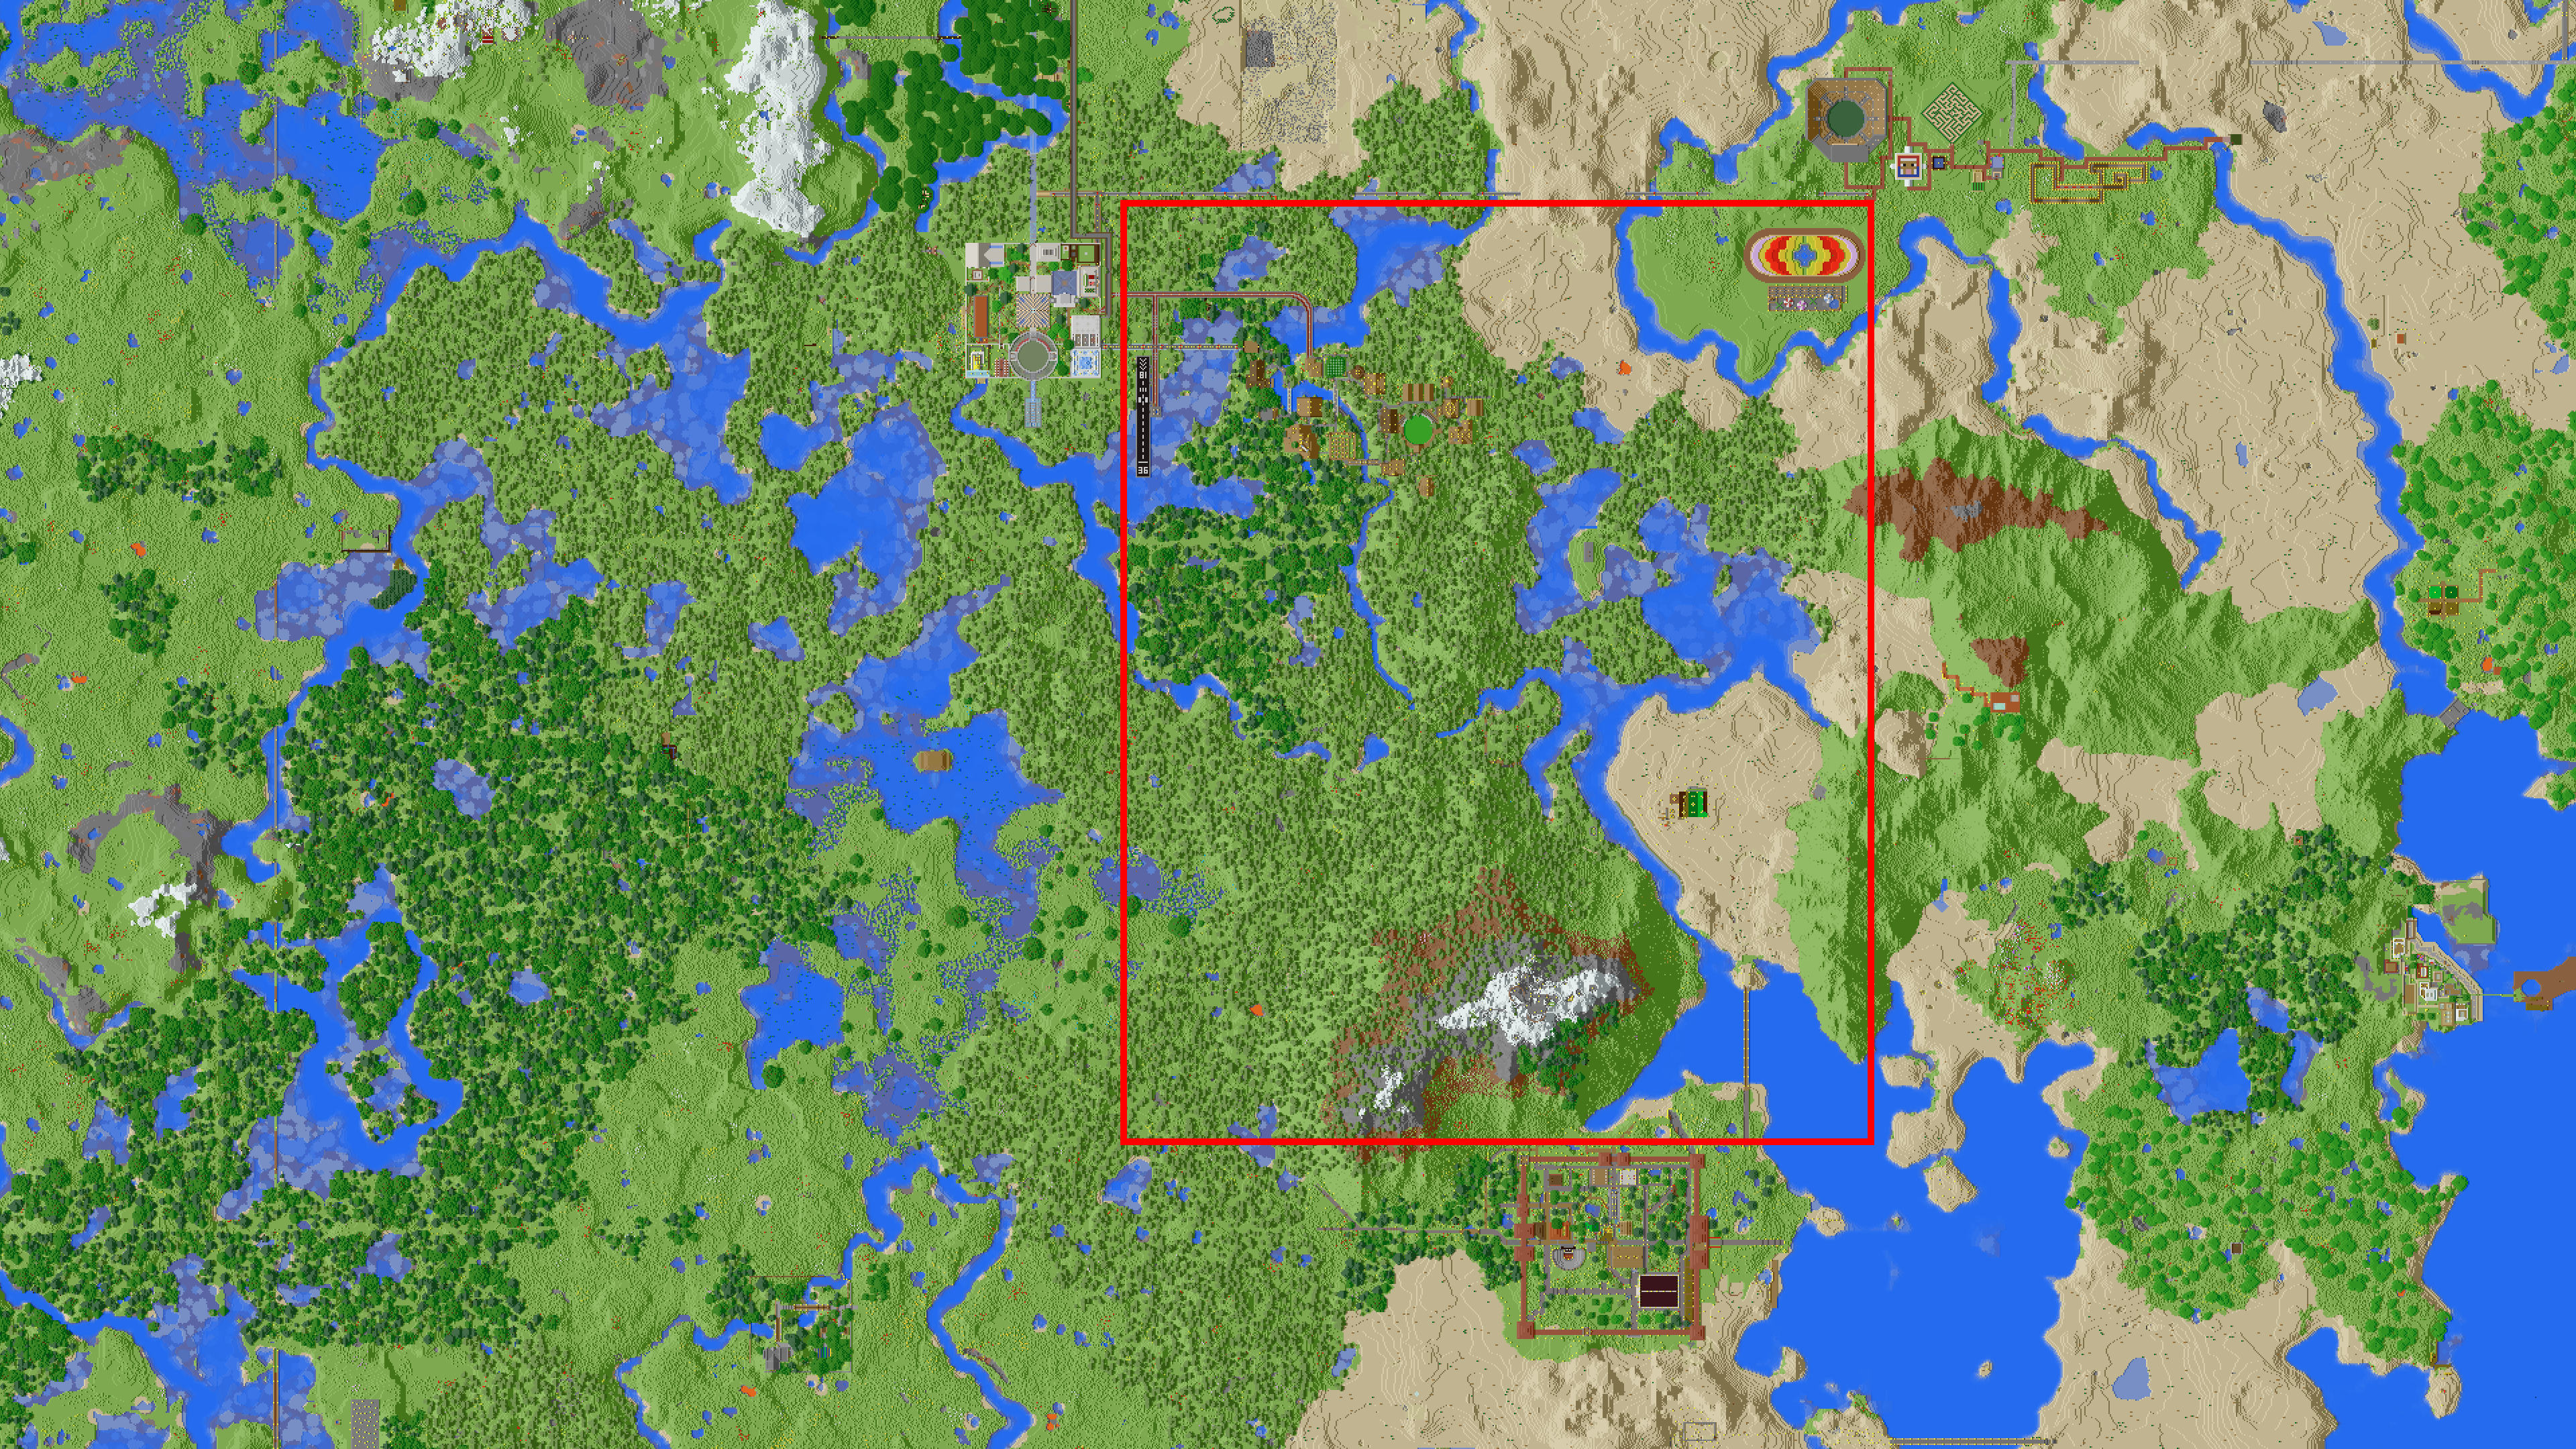
The area outlined above is significantly larger than the area I wound up rendering… initially I was thinking of a very different camera angle from the ground with the mountains in the background before I picked an aerial view much later. The size of the exported obj mesh was about 1.5 GB. Mineways exports the world as a single mesh, optimized to remove all completely occluded internal faces (so the final mesh is hollow instead of containing useless faces for all of the internal blocks). Each visible block face is uv’d into a corresponding square on a single texture file. This approach produces an efficient mesh, but I realized early on that I would need water in a separate mesh containing completely enclosed volumes for each body of water (Mineways only provides geometry for the top surface of water). Glass had to be handled similarly; both water and glass need special handling for the same reasons that I mentioned immediately after the first diagram in my attenuated transmission blog post. Mineways allows for exporting different block types as separate meshes (but still with internal faces removed), so I simply deleted the water and glass meshes after exporting. Luckily, jmc2obj allows exporting individual block types as closed meshes, so I went back to jmc2obj for just the water and glass. Since just the water and glass is a much smaller data set than the whole world, jmc2obj was able to export without a problem. Since rendering refractive interfaces correctly requires expanding out the refractive mesh slightly at the interfaces, I wrote a custom program based on Takua Renderer’s obj mesh processing library to push out all of the vertices of the water and glass meshes slightly along the average of the face normals at each vertex.
Next up was shading everything in Maya. Renderman 20 ships with an implementation of Disney’s Principled Brdf, which I’ve gotten very familiar with using, so I went with Renderman’s PxrDisney Bxdf. The Disney Brdf allows for quickly creating very good looking materials using a fairly small parameter set. Overall I tried to stick close to the in-game aesthetic, which meant using all of the standard in-game textures instead of a custom resource pack, and I also wound up having to reign back a bit on making materials look super realistic. Everything basically has some varied roughness and specularity, and that’s pretty much it. I did add a subtle bump map to everything though; I made the bump map by simply making a black and white version of the default texture pack and messing with the brightness and contrast a bit. Below is a render of a test world created by Minecraft Forum user QMagnet specifically for testing resource packs. I lit the test scene using a single IBL (HDRI Sky 141 from the HDRI-Skies library). The test render below isn’t using the final specialized water and leaf shaders I created, which I’ll describe a bit further down, and there are also some resolution problems on the alpha masks for the leaf blocks, but overall this test render gives an idea of what my final materials look like:

One detail worth going into a bit more detail about are the glowing blocks. The glowstone, lantern, and various torch blocks use a trick based on something that I have seen lighters use in production. The basic idea is to decouple the direct and indirect visibility for the light. I got this decoupling to work in RIS by making all of the glowing blocks into pairs of textured PxrMeshLights. Using PxrMeshLights is necessary in order to allow for efficient light sampling; however, the actual exposures the lights are at make the textures blow out in camera. In order to make the textures discernible in camera, a second PxrMeshLights is needed for each glowing object; one of the lights is at the correct exposure but is marked visible to only indirect rays and invisible to direct camera rays, and the other light is at a much lower exposure but is also only visible to direct camera rays. This trick is a totally non-physical cheaty-hack, but it allows for a believable visual appearance if the exposures are chosen carefully.
In the final renders a few pictures down, I also used a more specialized shader for leaves and vines and tall grass and whatnot. The leaf block shader uses a PxrLMPlastic material instead of PxrDisney; this is because the leaf block shader has a slight amount of diffuse transmission (translucency) and also has more specialized diffuse/specular roughness maps.
For the water shader in the final render, I used a PxrLMGlass material with an IOR of 1.325, a slightly blue tinted refraction color, and a light blue absorption color. Using slightly different colors for the refraction and absorption colors allows for the water to transition to a slightly different hue at deeper depths than at the surface (as opposed to just a more saturated version of the same color). I also added a simple water surface displacement map to get the wavy surface effect. Combined with the refractive interface stuff mentioned before, the final water looks like this:
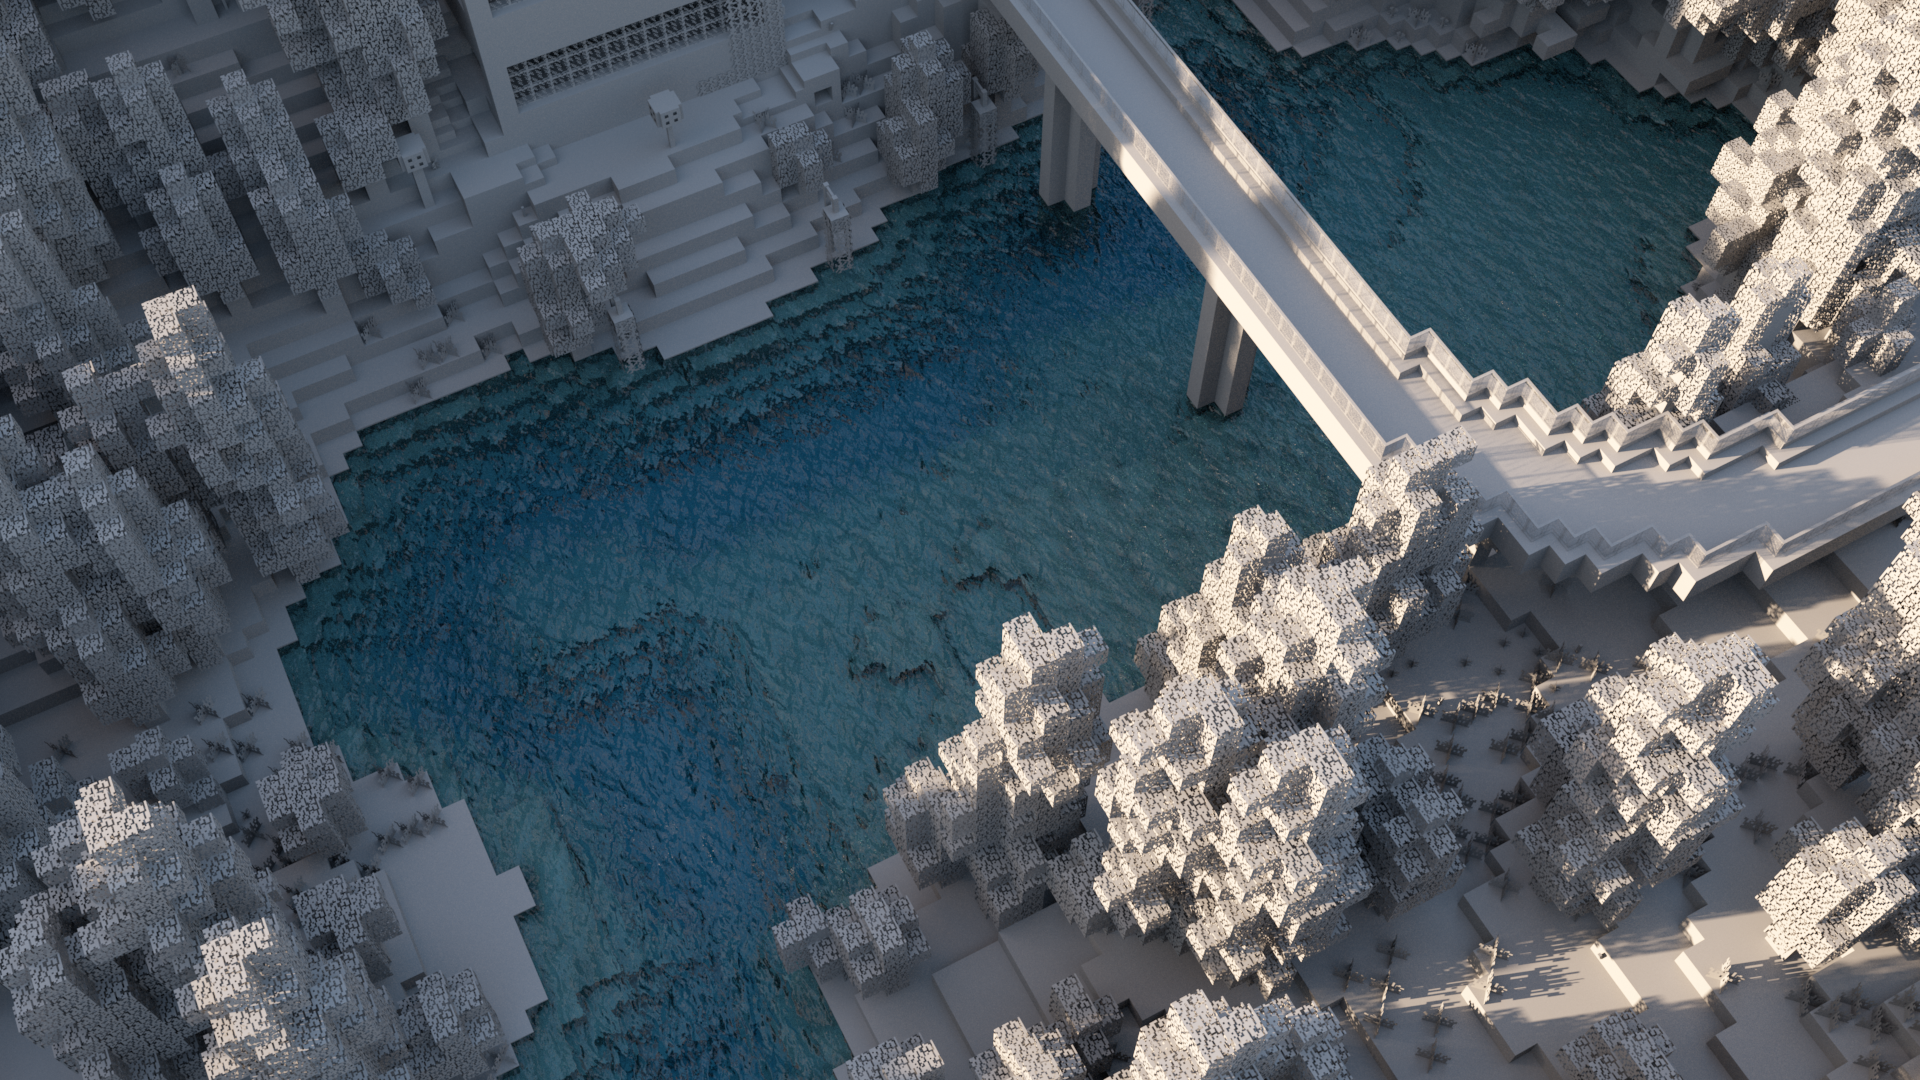
Note the total lack of real caustics in the water… I wound up just using the basic pathtracer built into RIS instead of Pixar’s VCM implementation. Pixar’s VCM implementation is one of the first commercial VCM implementations out there, but as of Renderman 20, it has no adaptivity in its light path distribution whatsoever. As a result, the Renderman 20 VCM integrator is not really suitable for use on huge scenes; most of the light paths end up getting wasted on areas of the scene that aren’t even close to being in-camera, which means that all of the efficiency in rendering caustics is lost. This problem is fundamental to lighttracing-based techniques (meaning that bidirectional techniques inherit the same problem), and solving it remains a relatively open problem (Takua has some basic photon targeting mechanisms for PPM/VCM that I’ll write about at some point). Apparently, this large-scene problem was a major challenge on Finding Dory and is one of the main reasons why Pixar didn’t use VCM heavily on Dory; Dory relied mostly on projected and pre-baked caustics.
I should also note that Renderman 21 does away with the PxrLM and PxrDisney materials entirely and instead introduces the shader set that Christophe Hery and Ryusuke Villemin wrote for Finding Dory. I haven’t tried the Renderman 21 shading system yet, but I would be very curious to compare against our Disney Brdf.
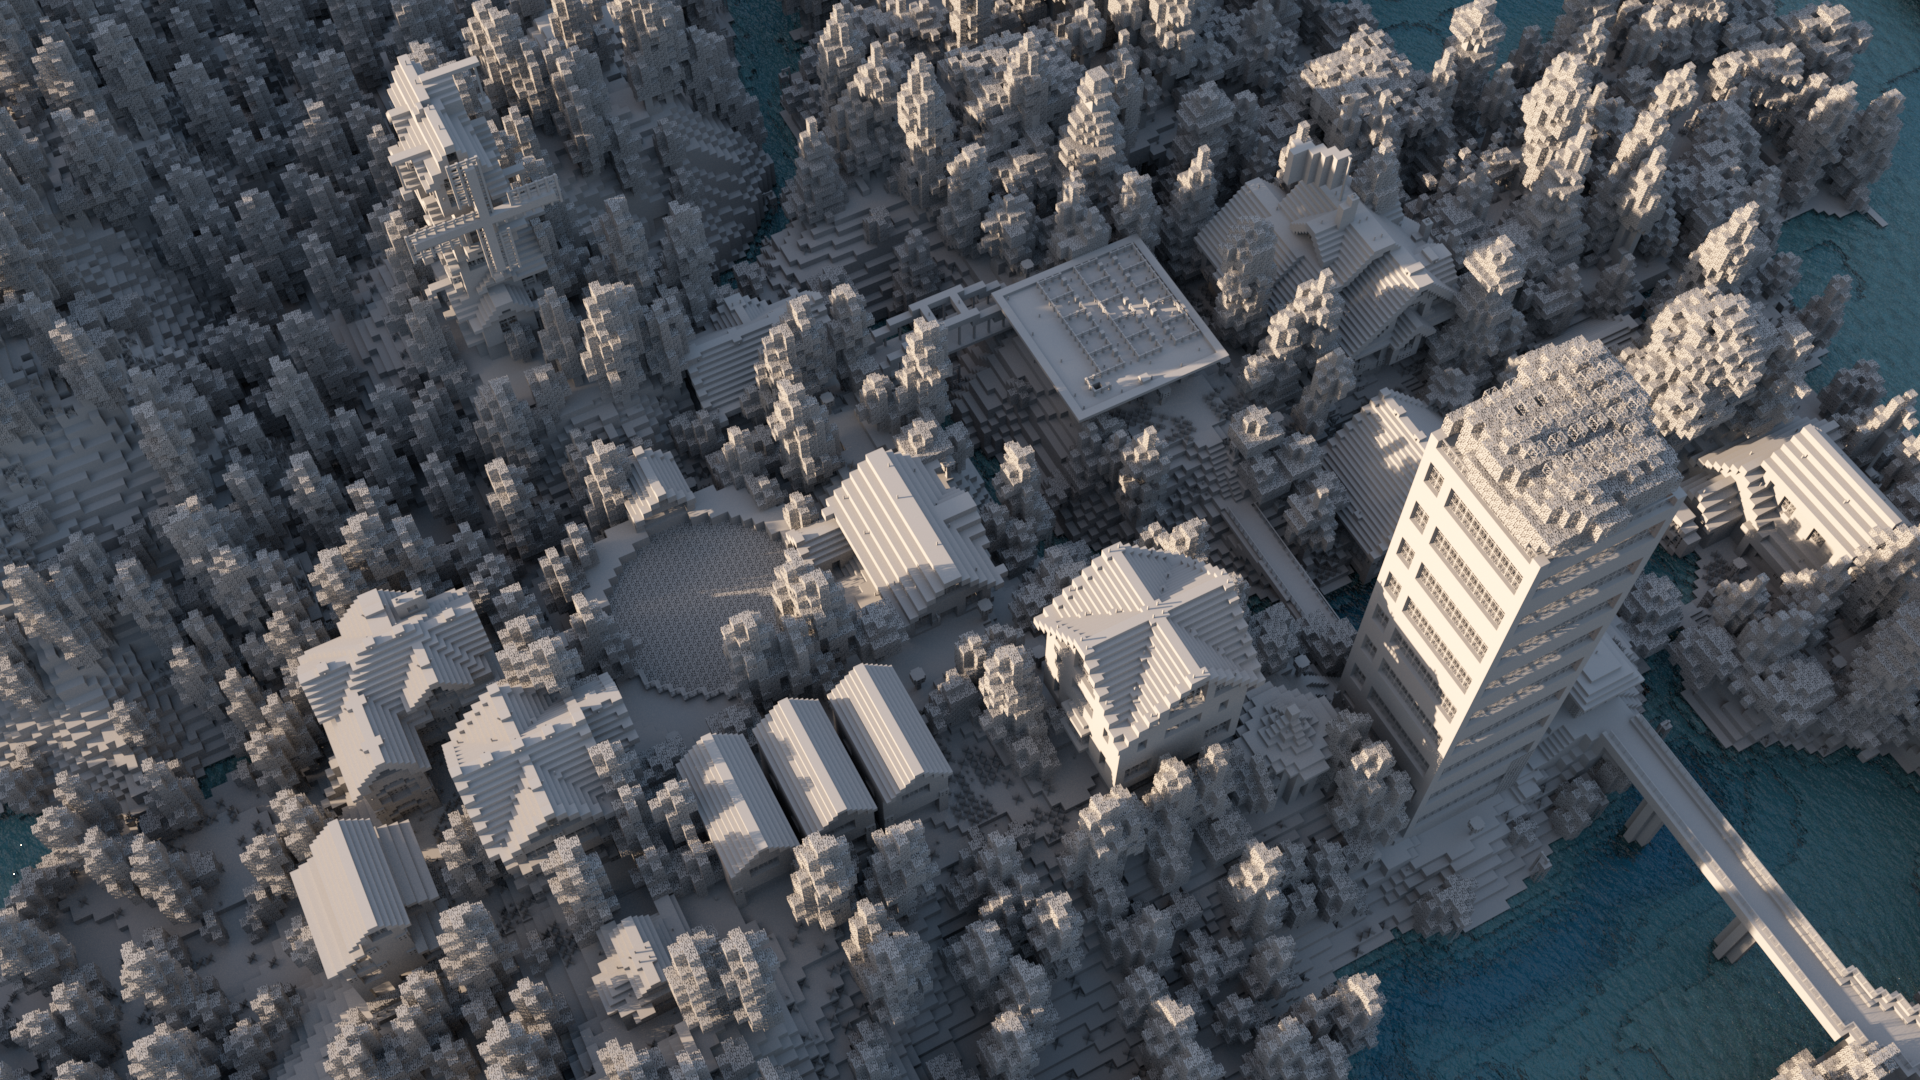
The final lighting setup I used was very simple. There are two main lights in the scene: an IBL dome light for sky illumination, and a 0.5 degree distant light as a sun stand-in. The IBL is another free sky from the HDRI-Skies library; this time, I used HDRI Sky 84. There is also a third spotlight used for getting long, dramatic shadows out of the fog, which I’ll talk about a bit later. Here is a lighting test with just the dome and distant lights on a grey clay version of the scene:
For efficiency reasons, I broke out the fog into a separate pass entirely and added it back in comp afterwards. At the time that I did this project, Renderman 20’s volume system was still relatively new (Renderman 21 introduces a significantly overhauled, much faster volume system, but Renderman 21 wasn’t out yet when I did this project), and while perfectly capable, wasn’t necessarily super fast. Iterating on the look of the fog separately from the main render was simply a more efficient workflow. Here is the raw render directly out of RIS:

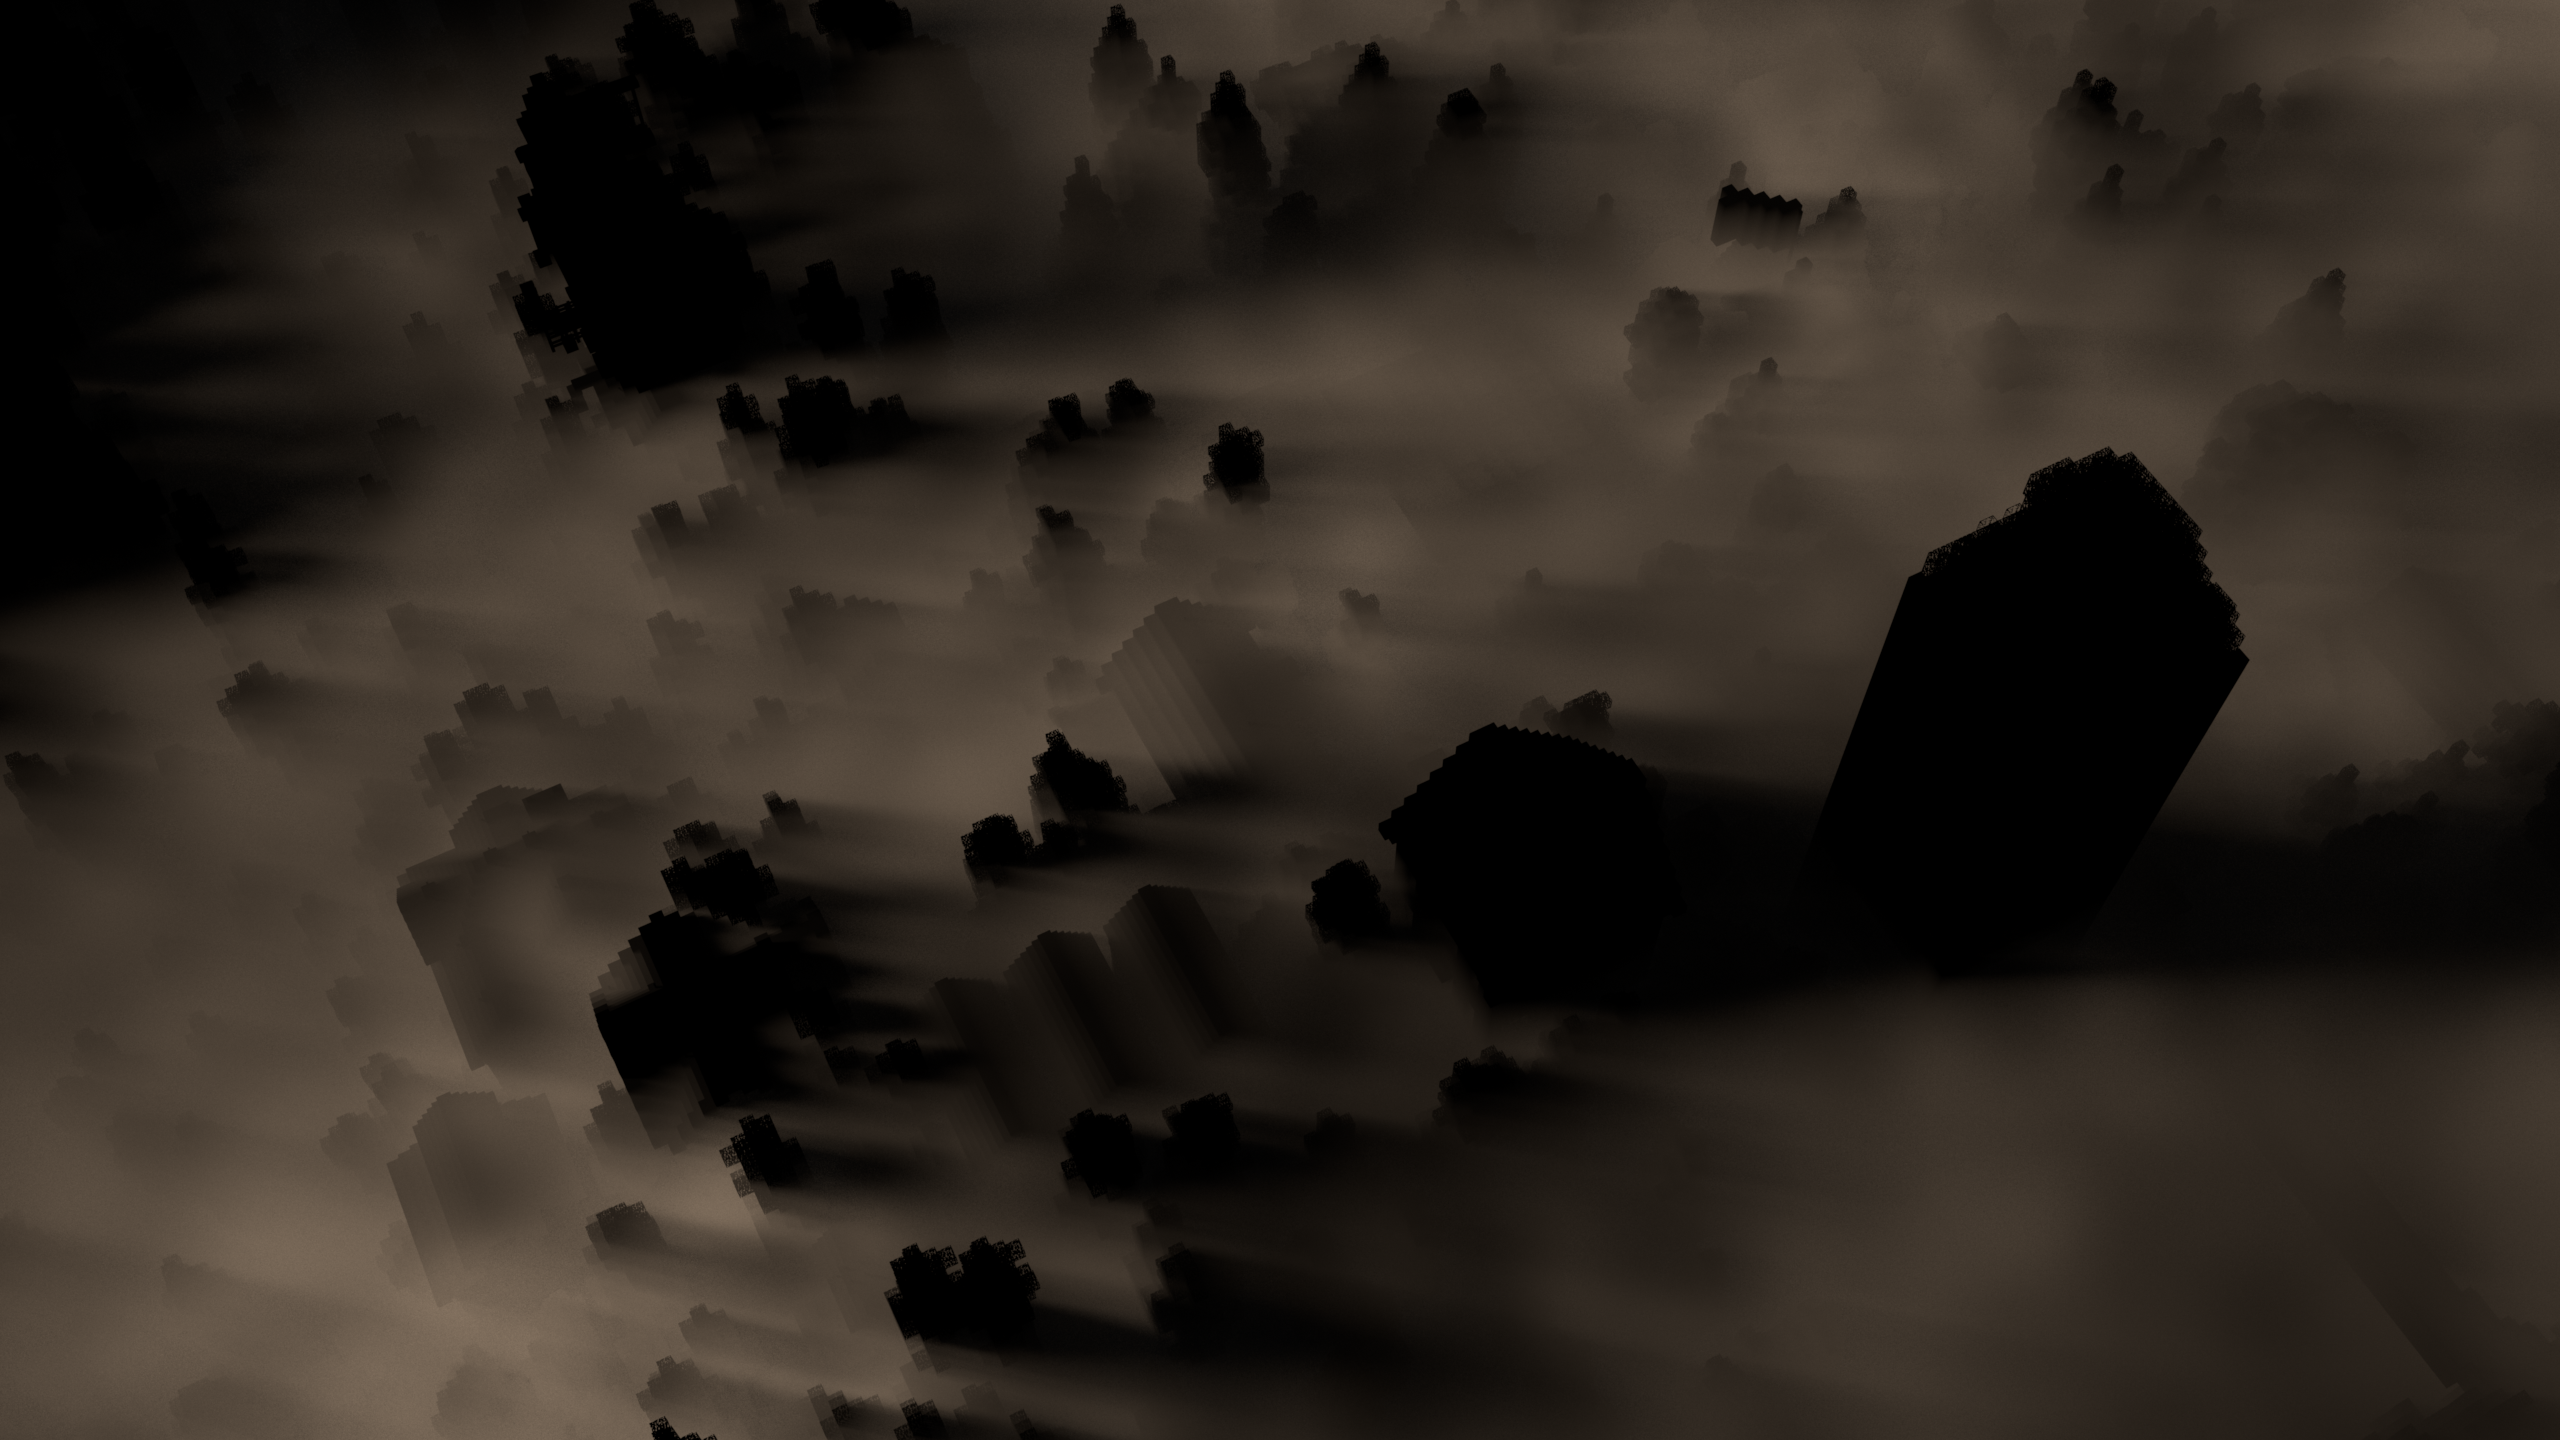
For the fog, I initially wanted to do fully simulated fog in Houdini. I experimented with using a point SOP to control wind direction and to drive a wind DOP and have fog flow through the scene, but the sheer scale of the scene made this approach impracticable on my home computers. Instead, I wound up just creating a static procedural volume noise field and dumping it out to VDB. I then brought the VDB back into Maya for RIS rendering. Initially I tried rendering the fog pass without the additional spotlight and got something that looked like this:
After getting this first fog attempt rendered, I did a first pass at a final comp and color grade. I wound up using a very different color grade on this earlier attempt. This earlier version is the version that I shared in some places, such as the Nerd.nu subreddit and on Twitter:

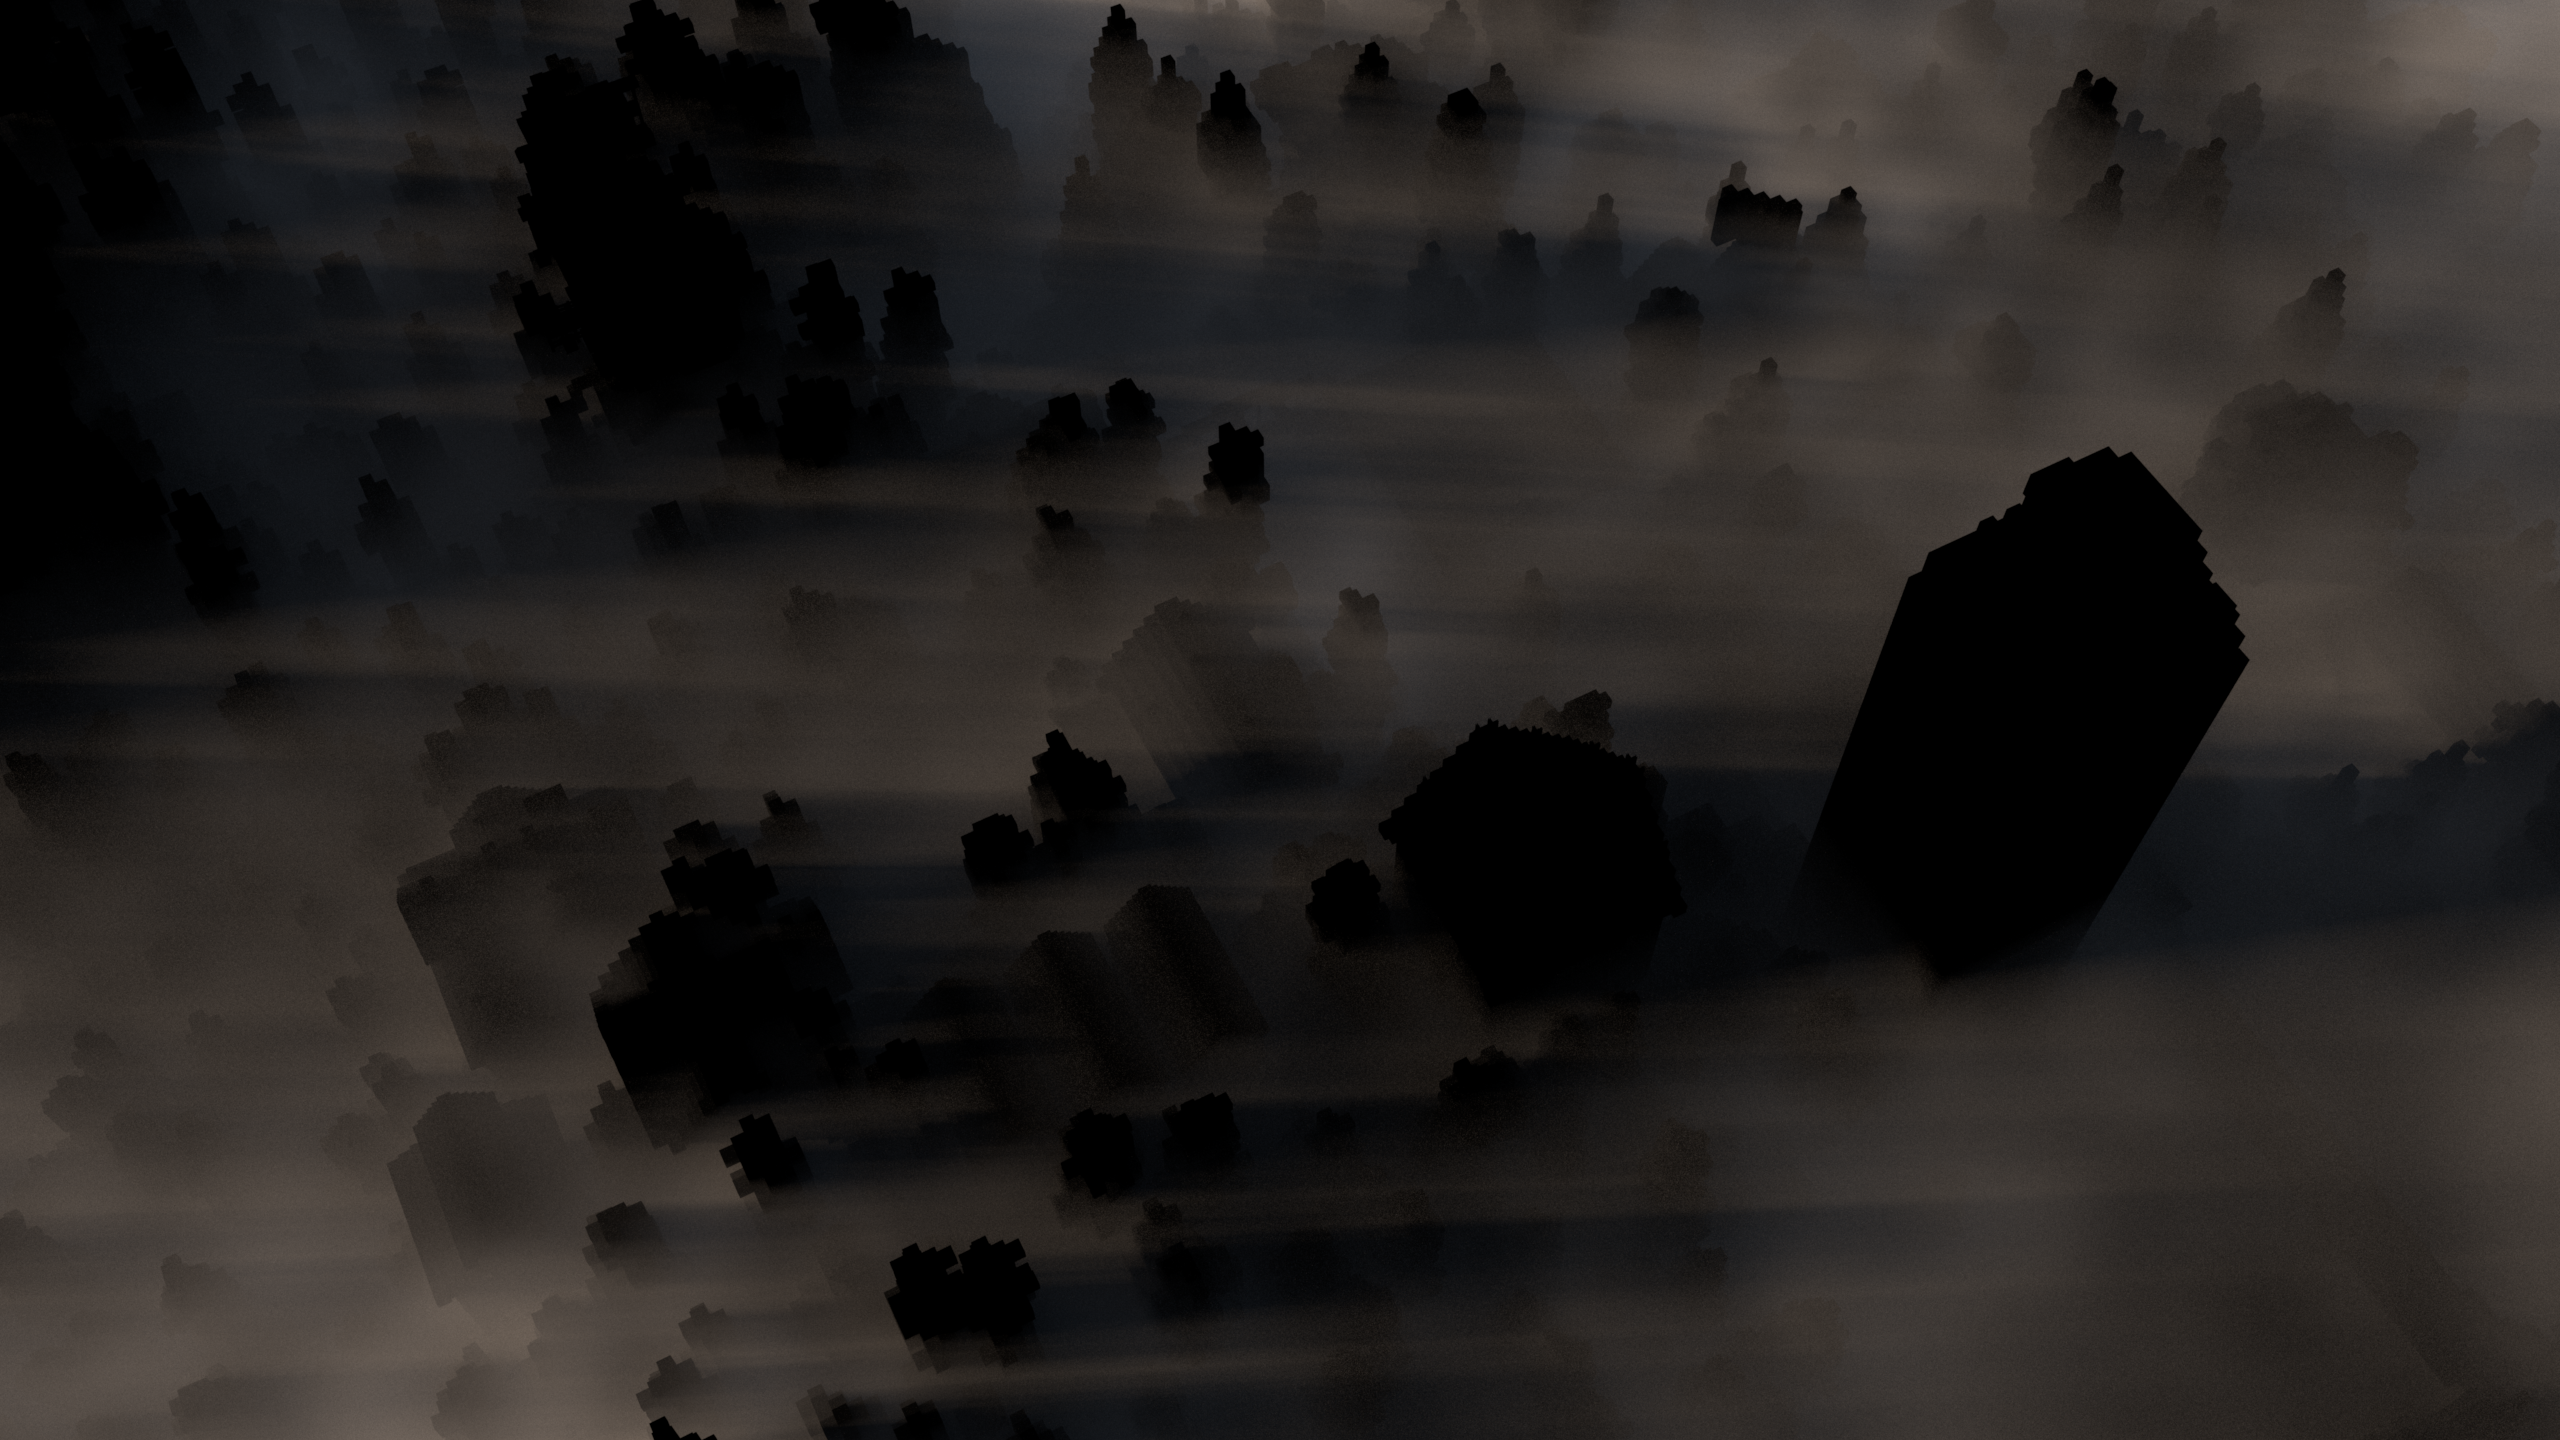
This first attempt looked okay, but didn’t quite hit what I was going for. I wanted something with much more dramatic shadow beams, and I also felt that the fog didn’t really look settled into the terrain. Eventually I realized that I needed to make the fog sparser and that the fog should start thinning out after rising just a bit off of the ground. After adjusting the fog and adding in a spotlight with a bit of a cooler temperature than the sun, I got the image below. I’m pretty happy with how the fog looks like it is settling in the river valley and is pouring out of the forested hill in the upper left of the image, even though none of the fog is actually simulated!
Finally, I brought everything together in comp and added a color grading pass in Lightroom. The grade that I went with is much much more heavy-handed than what I usually like to use, but it felt appropriate for this image. I also added a slight amount of vignetting and grain in the final image. The final image is at the top of this post, but here it is again for convenience:
I learned a lot about using RIS from this project! By my estimation, RIS is orders of magnitude easier to use than old REYES Renderman; the overall experience was fairly similar to my previous experiences with Vray and Arnold. Both Takua and Hyperion make some similar choices and some very different choices in comparison, but then again, every renderer has large similarities and large differences from every other renderer out there. Rendering a Minecraft world was a lot of fun; I definitely am looking forward to doing more Minecraft renders using this pipeline again sometime in the future.
Also, here’s a shameless plug for the Nerd.nu Minecraft server that this data set is from. If you like playing Minecraft and are looking for a fast, free, friendly community to build with, you should definitely come check out the Nerd.nu PvE server, located at p.nerd.nu. The little town in this post is not even close to the most amazing thing that people have built on that server.
A final note on the (lack of) activity on my blog recently: we’ve been extremely busy at Walt Disney Animation Studios for the past year trying to release both Zootopia and Moana in the same year. Now that we’re closing in on the release of Moana, hopefully I’ll find time to post more. I have a lot of cool posts about Takua Renderer in various states of drafting; look for them soon!
Addendum 2016-10-02
After I published this post, Eric Haines wrote to me with a few typo corrections and, more importantly, to tell me about a way to get completely enclosed meshes from Mineways using the color schemes feature. Serves me right for not reading the documentation completely before starting! The color schemes feature allows assigning a color and alpha value to each block type; the key part of this feature for my use case is that Mineways will delete blocks with a zero alpha value when exporting. Setting all blocks except for water to have an alpha of zero allows for exporting water as a complete enclosed mesh; the same trick applies for glass or really any other block type.
One of the neat things about this feature is that the Mineways UI draws the map respecting assigned alpha values from the color scheme being used. As a result, setting everything except for water to have a zero alpha produces a cool view that shows only all of the water on the map:
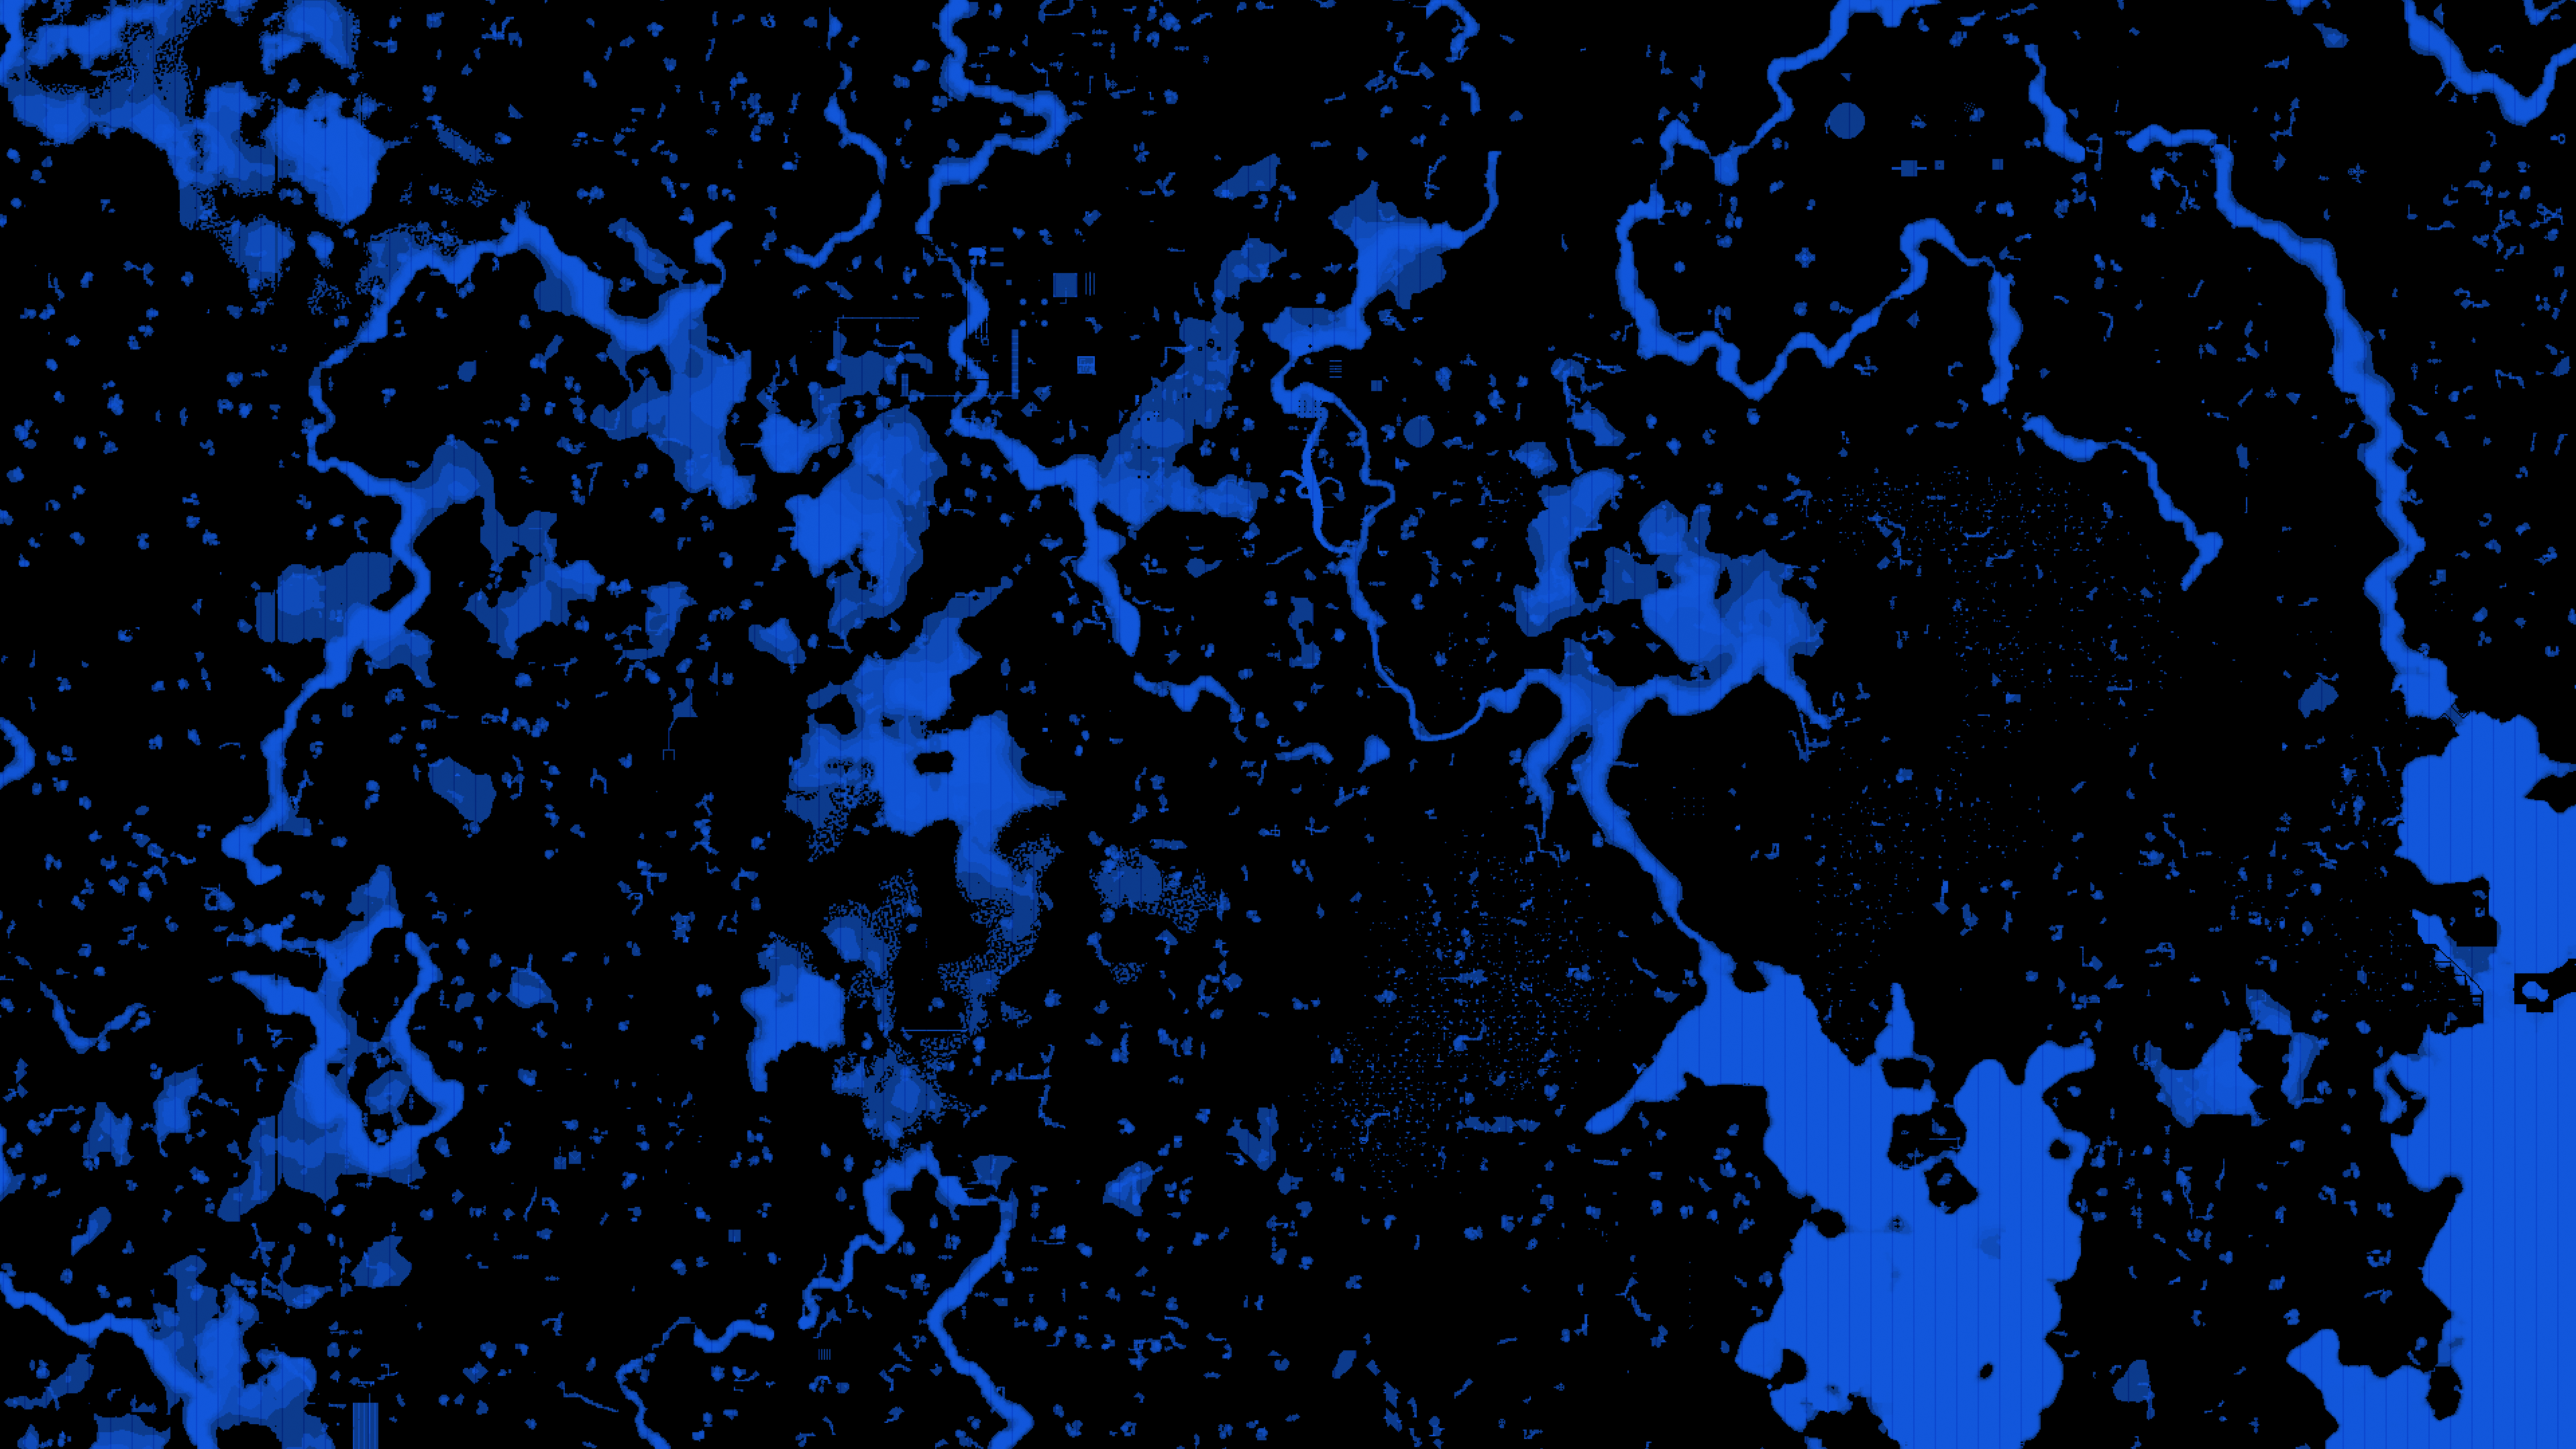
Going forward, I’ll definitely be adopting this technique to get water meshes instead of using jmc2obj. Being able to handle all of the mesh exporting work in a single program makes for a nicer, more streamlined pipeline. Of course both jmc2obj and Mineways are excellent pieces of software, but in my testing Mineways handles large map sections much better, and I also think that Mineways produces better water meshes compared to jmc2obj. As a result, my pipeline is now entirely centered around Mineways.